The incessant sound of a dripping faucet not only wastes water but also tests your patience. A leaky faucet is a common household annoyance, but the good news is that many faucet issues can be fixed with some basic tools and a little know-how. In this comprehensive DIY Faucet repair guide, we’ll walk you through the steps to tackle those stubborn drips and leaks, ensuring a leak-free and peaceful home.
1. Gather Your Tools:
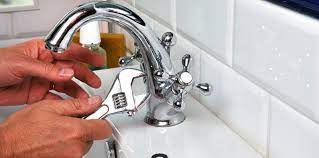
Before you begin, gather the necessary tools:
- Adjustable wrench
- Screwdrivers (flathead and Phillips)
- Replacement parts (washers, O-rings, cartridges, etc.)
- Plumber’s tape (Teflon tape)
- Towels or rags
2. Identify the Type of Faucet:
There are several types of faucets, each with different repair methods. The most common types are compression faucets, cartridge faucets, ball faucets, and ceramic disk faucets. It’s important to identify the type of faucet you have before proceeding with repairs.
3. Turn Off the Water:
Before you start disassembling the faucet, turn off the water supply. The water shut-off valves are usually located under the sink.
4. Fixing a Dripping Compression Faucet:
Symptom: Water continues to drip from the spout even when the faucet is fully closed.
Solution:
- Remove the faucet handle by prying off the decorative cap and unscrewing the handle.
- Use an adjustable wrench to remove the packing nut.
- Replace the rubber washer inside the faucet’s stem. This is often the cause of the drip.
- If the washer is fine, replace the O-ring around the stem.
5. Repairing a Leaky Cartridge Faucet:
Symptom: A cartridge faucet leaks from the spout, often due to a damaged cartridge.
Solution:
- Remove the faucet handle and the retaining nut that holds the cartridge in place.
- Pull out the cartridge and replace it with a new one.
- Apply plumber’s tape to the threads of the cartridge to ensure a watertight seal.
6. Fixing a Dripping Ball Faucet:
Symptom: A ball faucet leaks from the spout or the handle area.
Solution:
- Remove the faucet handle and cap, usually secured with a set screw.
- Use pliers to remove the cap and collar, exposing the faucet’s cam and ball assembly.
- Replace the worn-out seals, springs, and O-rings inside the assembly.
7. Repairing a Leaking Ceramic Disk Faucet:
Symptom: A ceramic disk faucet leaks from the spout due to damaged ceramic disks.
Solution:
- Remove the faucet handle, often by prying off a decorative cap.
- Unscrew the faucet handle and remove the ceramic disk cartridge.
- Replace the ceramic disks and O-rings inside the cartridge.
- Reassemble the faucet and test for leaks.
8. Reassemble and Test:
After completing the necessary repairs, reassemble the faucet in reverse order. Turn on the water supply and check for leaks. If you followed the steps correctly, your faucet should be leak-free.
9. Know When to Seek Professional Help:
While many faucet repairs are manageable as DIY projects, there are situations where professional assistance is recommended:
- Complex repairs involving specialized tools or parts
- If you’re unsure about the type of faucet you have
- If repairs have been attempted but the issue persists
Conclusion:
A leak-free home starts with addressing those pesky dripping faucets. Armed with the right tools, replacement parts, and a bit of guidance, you can confidently tackle common faucet issues and enjoy the peace and water savings of a well-maintained plumbing system. Regular maintenance and prompt repairs are key to preventing larger plumbing problems down the road, ensuring a smooth and worry-free household.